You would recognize the limitless hot water supply and energy-saving properties when you own a tankless water heater. However, regular maintenance, including descaling, is required to ensure your tankless water heater works efficiently. In this guide, we will provide you with the best tips and practices on how to descale your tankless water heater effectively for a longer lifespan and better performance of your appliance.
What is Scale and How Does it Affect Your Heater?
Scale is mineral deposits made up mostly of calcium and magnesium that naturally exist in hard water. These minerals precipitate out as scale when the water is heated.
Storage water heaters with tanks are susceptible to scale build-up necessitating periodic examination of anode rod as well as draining of tanks so as to avoid sediment buildup resulting in corrosion within the tanks.
While tankless units accumulate scale more slowly, they are not immune to it. Scale can stick to the internal surfaces of heat exchangers making them insulating hence lowering efficiency and potentially causing damage over time. Research reveals that without proper maintenance, a tankless heater can lose up to 30% efficiency due to scaling within two years.
Excessive deposition of scales may block the flow of water triggering error codes or system shutdown. Neglecting to descale your tankless water heater can drastically reduce its lifespan. Regular descaling is essential to prevent these issues.
How Often Should You Descale a Tankless Water Heater?
Regular descaling and simple maintenance tasks ensure your tankless water heater remains in optimal condition, delivering reliable and efficient performance.
How often to descale tankless water heater depends mainly on how hard the water is in your area. For most households, JNOD recommends annual maintenance, which is generally sufficient to keep your system running efficiently. In areas with hard water, where there’s a high concentration of dissolved minerals and rate of scale buildup, more frequent descaling—every 6 to 12 months—is advisable.
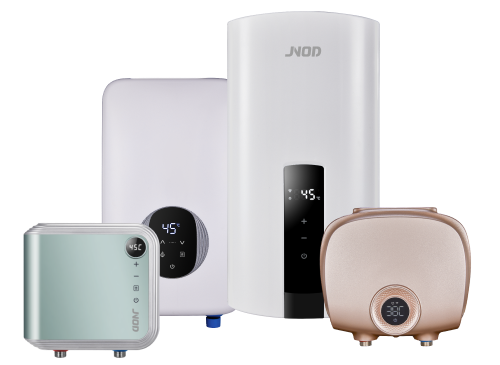
JNOD’s innovative cast aluminum heating element technology offers excellent resistance to hard water, effectively preventing scale buildup. This advancement not only enhances the efficiency of the tankless water heater but also extends its lifespan. JNOD’s tankless water heaters require minimal maintenance; in fact, beyond occasionally cleaning the inlet filter screen, there’s little upkeep necessary.
What to Prepare for Descaling a Tankless Water Heater?
Preparing for descaling a tankless water heater involves gathering all the necessary tools and materials to ensure a smooth and efficient process.
Here’s what you’ll need:
● A sufficient amount of household white vinegar or a commercial descaling solution (recommended for heavily scaled systems)
● A submersible pump
● Two 5-gallon buckets
● 3 to 4 feet of drainage hose
● Basic tools such as a wrench and screwdriver
It’s also crucial to protect yourself by wearing safety gloves and goggles to prevent injury from splashes or spills.
Step-by-Step Guide About How to Descale Tankless Water Heater
You can easily descale a tankless water heater through the following steps:
| Step | Task |
| 1 | Turn off the power and water supply (circuit breaker/gas valve, water valves) |
| 2 | Open and drain the purge valves (attach hoses, open valves to drain) |
| 3 | Connect the descaling hoses (pump to cold water inlet, hot water outlet to bucket) |
| 4 | Prepare and add the descaling solution (pour solution into bucket, submerge pump) |
| 5 | Circulate the descaling solution (run pump for 30 min, replace solution, run another 30 min) |
| 6 | Flush the system with fresh water (run cold water for 10 min, clean filter) |
| 7 | Reassemble and restart the heater (check for leaks and ensure proper operation) |

Step 1: Turn Off the Power and Water Supply
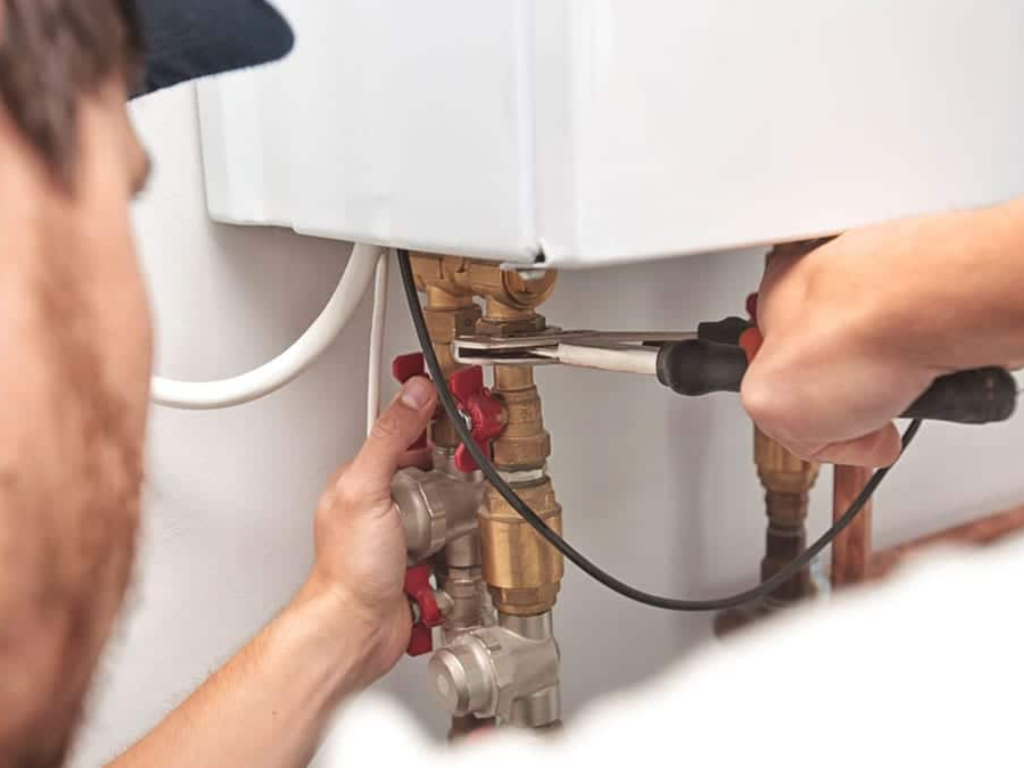
First, turn off the power to your tankless water heater. If it’s an electric unit, switch off the circuit breaker. For gas units, turn off the gas valve. Next, close the water valves—including the cold water inlet valve, hot water valve, and main valve—to prevent any water from entering the unit during the descaling process.
Step 2: Open and Drain the Purge Valves
Locate the purge valves on your tankless water heater—usually, these are found on the water lines. These are typically colored handles (red for hot water side and blue for cold water side). Attach a hose to each valve and place the other ends into a bucket. Open the purge valves to drain any remaining water from the heater. This helps to prevent dilution of the descaling solution and ensures a more effective cleaning process.
Step 3: Connect the Hoses for Descaling
Attach one end of a drain hose to the submersible pump and the other end to the cold water inlet valve. Connect another hose from the hot water outlet valve to the bucket containing the descaling solution. Ensure all connections are secure to prevent leaks. Position the bucket lower than the water heater to leverage gravity for better drainage. This setup will allow the descaling solution to circulate through the heater, effectively breaking down mineral deposits, ensuring a thorough cleaning.
Step 4: Prepare and Add the Descaling Solution
Prepare your descaling solution according to the manufacturer’s instructions. Consider your tankless water heater size, as larger units might require more descaling solutions. If using white vinegar, a typical ratio is one gallon of vinegar to one gallon of water. Pour the solution into the bucket. Place the submersible pump into the bucket, ensuring it is fully submerged. This will enable the pump to draw the solution into the heater.
Step 5: Circulate the Descaling Solution
Open both drain valve handles on the isolation valves, then turn on the submersible pump. Allow the descaling solution to circulate through the heater for at least 30 minutes. For optimal results, after the initial 30 minutes, replace the vinegar solution with a fresh batch and repeat the circulation process for another 30 minutes. To replace the solution, turn off the pump, close the drain valves, and safely dispose of the used solution. Refill the bucket with new vinegar and restart the pump.
During this process, your tankless water heater might attempt to restart itself. Since the power supply has been cut off, it will not actually turn on, but this could trigger an error code. This is completely normal and nothing to worry about. Do not reset the heater; simply focus on completing the descaling process.
Step 6: Flush the System with Fresh Water
After circulating the descaling solution for at least an hour, turn off the pump and close the drain valves. Carefully dispose of the used solution by following the same steps you used to replace the vinegar earlier. Disconnect the hoses from the pump and the drain valves, then reconnect them to the cold water inlet and hot water outlet valves on your heater.
Open the cold water valve and let the clean water run through the system for about 10 minutes to remove any remaining descaling solution.
If your system includes a filter, this is also an ideal time to clean it. Remove the filter, rinse it thoroughly under running water to remove any debris or deposits, and then dry it before reinstalling. Make sure to secure it tightly to avoid leaks.
Step 7: Reassemble and Restart the Heater
Once the system is thoroughly flushed, close the flushing valves and remove the hoses. Reconnect any components you detached earlier. Open the main water supply valve and restore power to the heater. To clear any error codes generated during the descaling process, you’ll need to turn the heater off and then back on. This reset helps the system recognize the absence of previous issues. Be sure to check for leaks and ensure the heater is operating correctly. If everything looks good, your tankless water heater is now descaled and ready for use, delivering efficient, hot water once again.
Post-Descaling Maintenance Tips
Congratulations, you’ve successfully descaled your tankless water heater! To prolong the benefits of your hard work, follow these post-descaling maintenance tips. First, invest in a water filter to reduce the incoming mineral content and slow down future scale buildup. Regularly check for error codes on your heater, and if you notice any, address them immediately.
Monitoring your heater’s performance can also help detect early signs of scale buildup. If you notice a decrease in water temperature or flow rate, it may be time to descale again. Keeping a maintenance log can help you track descaling intervals and any other maintenance performed on your heater. Perform annual inspections and routine maintenance to keep your heater in peak condition.
Conclusion
Descaling your tankless water heater is a crucial part of its maintenance. By following this guide, homeowners can ensure their heater operates efficiently and has a long lifespan. Regular descaling of the mineral buildup helps prevent costly repairs and maintains the quality of your hot water. Remember, proper maintenance not only extends the life of your appliance but also ensures it runs efficiently, saving you money on energy bills. Different types of water heaters require specific maintenance routines, so it’s important to know your model and follow the appropriate guidelines.
JNOD: A Leading Manufacturer of Tankless Electric Water Heaters
With over 15 years of experience in the water heating industry, JNOD stands out as a premier manufacturer of tankless electric water heaters. They continuously push the boundaries of innovation, integrating cutting-edge technology into their product development. Boasting 42 industry-leading patents, JNOD’s water heaters feature advanced multi-layer heating chambers and extended water pathways, ensuring exceptional performance and maximum efficiency. Notably, JNOD pioneered China’s first patented cast aluminum heating element technology, setting a new standard in the industry. This commitment to excellence makes JNOD a top choice for those seeking reliable, high-efficiency tankless water heating solutions.
